Showing posts with label akas. Show all posts

Saturday, November 15, 2014

Main Bulkhead Work

I have been trying to do several small projects in parallel.   One of the recent projects are the main bulkheads that are at both ends of the main cabin.   These stations have reinforcing planks where the aka cross beams will bolt through the hull.

The unfinished area in the middle gets cut out of the companionway after the bulkhead is in the hull. Until then, it is an extra bracing support.


The bulkheads are large enough that they came from two pieces of plywood.  After gluing the puzzle joints, I have coated both sides with three layers of epoxy.  The epoxy then got sanded back as smooth as I could get it, so it is now ready for final finishing.

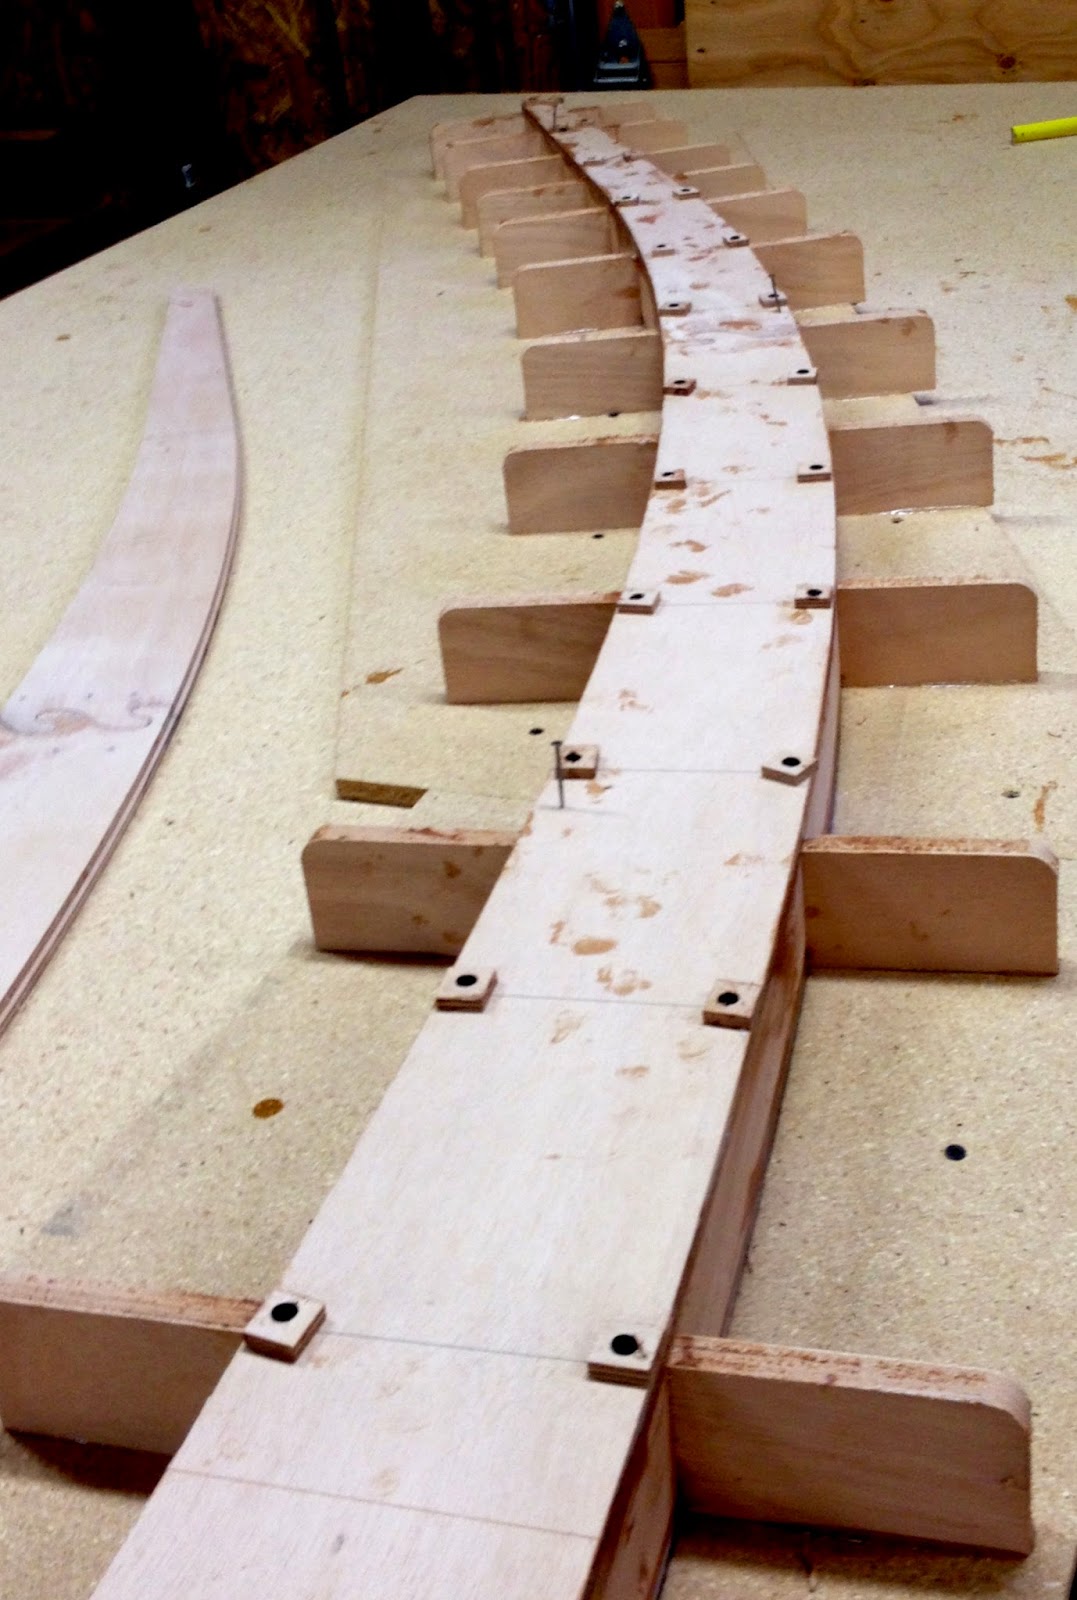
The reinforcing planks will get epoxied to the bulkheads before being placed on the strongback.  The planks were shaped from templates that I had made a few months back.  I recently dry-fitted them to the bulkheads with screws through the back.  This allowed me to get the alignment correct and bore holes for the aka bolts.  The screw holes will get filled with epoxy later.   They will mar the less visible surface of the bulkhead a bit.   The screws will be used to accurately locate the planks when they are slick with glue and to help with clamping.


I left the epoxy coating off of the gluing surface of the bulkheads.  This will give an area for a primary wood to wood bond.  Probably not that critical, but it can't hurt.


The hole through the bulkhead gets a similar treatment to the akas.  A G10 tube is inserted and then there is a 75mm cplate washer that the bolt will tighten against.


Task time: 20 hours
Total project time: 331 hours

Sunday, March 16, 2014

Buttoning Up First Aka

We put the lid on the first aka.  There were quite a few small steps to getting this right.  The first things were to thoroughly coat all of the raw wood in the interior.  I went over the wet epoxy with a heat gun to thin it and make sure it penetrated pretty well.  

Next was filling in the solid wood area on the windward end.  This took three pieces of 18mm plywood that ended up stacked. The pieces were shaped to fit pretty tight.  It was messy because you need to use thickened epoxy very liberally so that squeeze out from the layers would force up the side gaps. The very end got filled with solid epoxy since wood would not fit very well.


Wood and epoxy in the "nose".


Clamping Pads.

Clamping pads had to be made out of 6mm plywood.  These are 3/4 by 3/4 inch squares pre-drilled with oversize holes.  The top panel was pre-drilled every seven inches for even clamping pressure.


7/64s holes for screws.


An  ad hoc  jig to drill all the holes 3/16ths from the edge and centered on the 18mm (3/4 inch plywood).

The top is temporarily nailed to keep it aligned in place while the holes are drilled down into the plywood sides through the top plate.  The nails get pulled partially out.  A small bit of nail is left exposed at the bottom of the top panel.  These nails help you find their original holes and align the panel when it is extremely slick with thickened epoxy.

The remaining surfaces and edges get primed and then buttered with thickened epoxy.  The panel is upside down to be primed.

A crucial moment is when you have to flip the flexible 18 foot panel on to the box sides.  You need to drop it fairly close to it's final position so that you don't rub glue off of area by shifting it while it is laying unclamped.


After clamping.


The 64 screws are then run through the pads into the pre-drilled holes.  The screws are #6 1 inch drywall type, which have been coated lightly with WD-40.  The lubricant keeps the screws from bonding to the work.  Without this, the screws would probably break off when removing them.  We don't like metal lodged in our plywood.


The blocking on the leeward end.  The excess side panel will be trimmed when dry.


Lastly, excess squeeze-out must be carefully scraped off the sides to reduce sanding.


Task time: 8 hours
Total project time: 168 hours


Wednesday, March 5, 2014

Unclamping Puzzle Joints

I cleaned up yesterday's puzzle joints.


Just released.


After some sanding.  Flatter than they look.


The results were reasonably pleasing.  Some of the joints had part of the glue drain out leaving slight gaps at the upper surface.  The joints are quite strong regardless.  You can hold the panel up and let the ends droop with no problems.  

The gaps and the holes can be filled with thickened epoxy in a syringe. If the thickened batch is mixed with the proper amount of brown fairing filler you can match the color and the holes will disappear. Color is only an issue on visible interior joints.

Did more work on internal blocking and glued another four joints.

Task time: 4 hours 
Total project time: 149 hours

Friday, February 28, 2014

Aka Progress

The last couple of days have been slow progress on the akas. I did my first scarfs of the top and bottom beams.  This was interesting because it was my first scarf of this type ever.  Added to that, I had to deal with minor issues of the scarf being near a curve and the fact that the two pieces were not exactly the same size.  The lamination had to be greater or equal to 18 mm thick.  I had to make them slightly oversize to insure this.  Given that they had a curve, the was not real way to plane them back to 18mm.


Close up of glue up. Laminated fir is closer, plywood in the background.


Longer picture.


Scarf after cleanup.


I have also started gluing up blocks for internal reinforcement where the aka attaches to the main hull. These need to be 58mm thick.  I have been using plywood scrap and gluing 90/90 to the outer grain. Paul told me that the components should be cut out so that the grain is oriented 45/45 to the load on the aka.  In other words, there would be Xs along the sides of the aka like trusses on a bridge.

The glue ups are pretty ugly.


When you start cleaning them up, they look a little better.


Task time: 7 hours (last 2 days)
Total project time: 133 hours